Saturday, March 5, 2011

Kat Von D True Romance Eyeshadow Palette in Truth

Without getting into what I think of her personal life, I really like the Kat Von D makeup line exclusive to Sephora.  Her most recent True Romance eyeshadow palette, Truth, caught my eye immediately.  I was intrigued by the crazy greens coupled with the pinks and purples.  I wasn't sure how to pull off a look with this product, but after having fun experimenting, I created a couple fun looks to show you.  

First, let's talk about the colors included in this palette.


 THE PALETTE:

COLORS
TOP ROW: 
Sugar Skull (vanilla metallic with greenish gold flash)
Long Distance (opaque citron green metallic)
Snake Eyes (pale green metallic with a slight gold flash)
Finland (greenish blue cream)

BOTTOM ROW:
Prague (very opaque dark purple with pinkish flash)
Galeano (medium purplish pink metallic)
Rehab (light pinkish gold metallic)
Sister (chalky peachy pink matte)


Swatches on my arm.  I did the swatches over the NYX Eyeshadow primer base in White.


My favorite color is definitely Long Distance.  It's such a great bright citron green!  I also love Prague for my crease.  Sugar Skull and Rehab work great for highlights and under the brow.  I don't really care for Finland.  It's the only cream in the palette.  I really had to work to get it to show up in the swatch.  If you work with it too much, it just sort of blends away.  Definitely not a buildable color.  And I also don't care for Sister.  Again, I had to really work for it to show up on the swatch.  It's very chalky and hard to work with.  

I love the palette, but my biggest complaint is that it really needs another crease color.  Unless you're going for a really subtle look, Prague is the only good crease color in this palette.  But the way I look at Kat Von D palettes is that they are not meant for subtlety.  They are bold colors and are definitely made for a more adventurous and edgy look, which is why I have great fun experimenting with them!

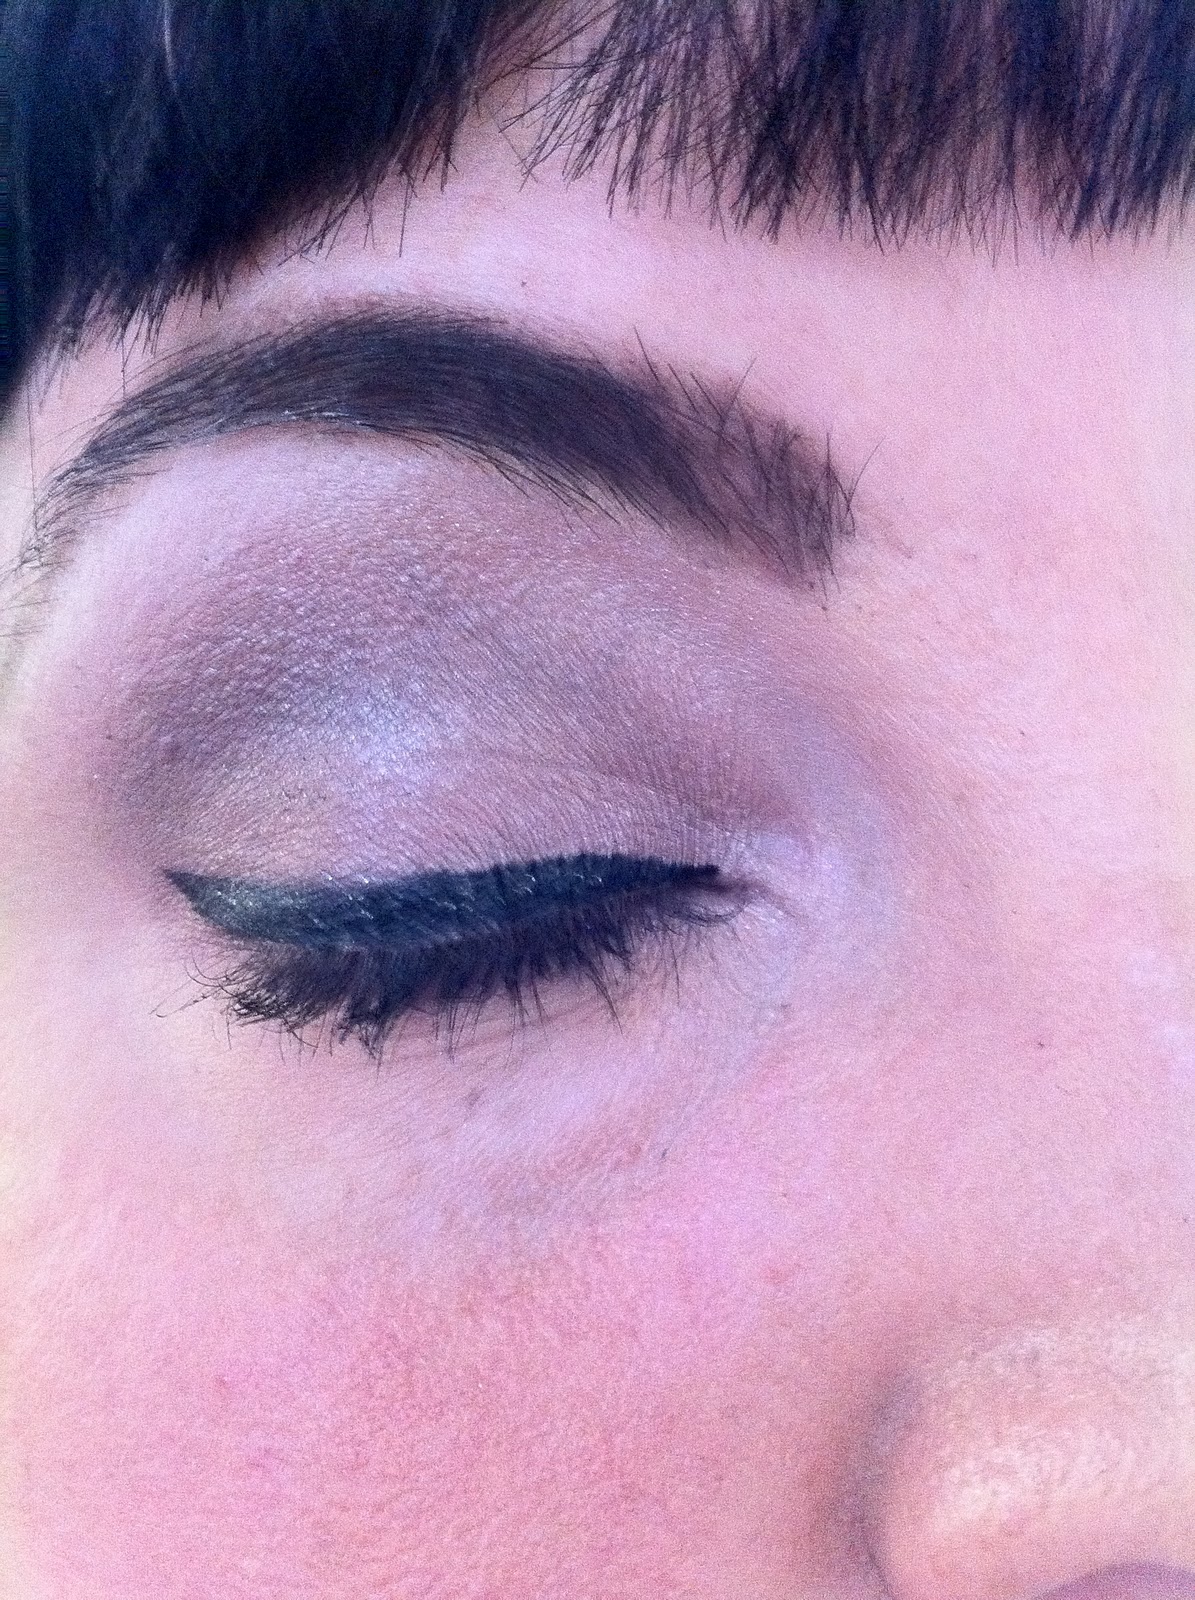
The first look I did was a smokey eye using Galeano on my lid, Prague in my crease, and Rehab on my brow bone:


Average White Girl Recipe For Kat Von D Truth Smokey Eye:
  1. Prime eyes with Urban Decay Primer Potion.
  2. Apply Rehab to inside corner of eye and bring up and along the brow bone.
  3. Pack lid with Galeano.
  4. Use a fluffy crease brush and grab some Prague.  Using a "windshield wiper" type motion with your brush, feather it into your crease and work it up to the brow bone.
  5. Use a stiff dome crease brush and grab some more Prague.  Use a "windshield wiper" motion again, but this time focus on the outer corner of your lid.  This will create a V shape that will blend into your crease and create that "smokey" look.
  6. Apply more Prague to the lash line from the outer corner and blend towards the inner corner.
  7. Apply Galeano to the lash line from the inside corner and blend it into the Prague.
  8. Go back with more Galeano and apply to lid again.
  9. Go back with more Rehab and apply to brow bone again.  Be sure to blend it down into the Prague, but not too far down.  Just enough to soften the line.
  10. Line top lash line with your favorite black eyeliner.  I used LORAC's Front of the Line PRO liner in Black.
  11. Curl lashes and apply your favorite black mascara to both top and bottom lashes.  I used Maybelline The Colossal Volum' Express in Glam Black. 


In this example, I was going for a more adventurous, dramatic look using Long Distance, Sugar Skull, and Prague:


Average White Girl Recipe For Kat Von D Truth Look: Long Distance/Prague/Sugar Skull:
  1. Prime eyes with NYX Eye Primer Base in White.  When I use bright colors, I like using this base, because the bright colors really pop on the white and keep the color from fading.
  2. Apply Sugar Skull to inside corner of eye and bring up and along the brow bone.
  3. Pack lid with Long Distance.
  4. Use a fluffy crease brush and grab some Prague.  Feather it into your crease and work it up to the brow bone.
  5. Apply more Prague to the lash line from the outer corner and blend towards the inner corner.
  6. Apply Long Distance to the lash line from the inside corner and blend it into the Prague.
  7. Go back with more Long Distance and apply to lid again.
  8. Go back with more Sugar Skull and apply to brow bone again.  Be sure to blend it down into the Prague, but not too far down.  Just enough to soften the line.
  9. Line top lash line with your favorite black eyeliner.  I used LORAC's Front of the Line PRO liner in Black.  In this example, I made very dramatic wings with my liner to make the look really dramatic and fun.
  10. Curl lashes and apply your favorite black mascara to both top and bottom lashes.  I used CoverGirl LashBlast Luxe Shimmery Volumizing Mascara in Black Platinum.
I hope you enjoyed these looks I created using the Kat Von D True Romance Truth palette.  I'll put together some looks using Snake Eyes, Finland and Sister sometime soon.  Don't be afraid to use bold colors and have fun with them!


Wednesday, February 16, 2011

Benefit New Product Alert: Prrrrowl!

I am a huge fan of Benefit Cosmetics.  Although they are on the pricey side (paying for the pretty packaging!), their products are quality, and I love how they mix a fresh faced look with vintage glamour and out of the box concepts.

Their newest product is called Prrrowl.  I don't own Prrrowl, but I checked it out at Ulta the other night. Basically, it's a mascara top coat on one end and a lip gloss on the other.  I know, weird, right?  But the common theme with both products is they contain peacock blue glitter.


The mascara is intended to be worn as either a top coat over your favorite shade of mascara, or it can be worn alone.  It's a black tint with pretty peacock blue colored glitter.  I tried some on, and I have to tell you, it's VERY subtle.  I'm a huge glitter gal myself, so I was hoping for something that screams out BLUE GLITTER MASCARA!!!  But unless you point out to someone that it has blue glitter in it, no one will be able to tell.  I've read some reviews on the product, and people are using it as a liquid eyeliner in lieu of mascara.

As far as the gloss goes--it goes on shimmery pink.  After awhile, the pink wears off, and you have blue glitter on your lips.  A little strange.  I guess it's supposed to make your teeth look whiter.

Here is a video review of the product.  I couldn't even tell the difference when she put the gloss or mascara on.  Disappointing.


I think the concept is cute, but just not very practical.  The mascara needs more blue glitter in it to show up well on your lashes, and the gloss needs less glitter in it so you don't end up with blue lips.  For $28, I'm probably not going to own this one anytime soon.  I wish you could buy the mascara and the gloss separately.  I'd buy the mascara for $15-$18 on its own.

If anyone purchases this product, please leave a comment and let me know how you like it!

Friday, February 4, 2011

New LORAC Multidimensional Beauty Collection for Eyes and Lips

LORAC always has really great sets at decent prices.  I like their sets, because they don't give you trial sizes of everything and slap a $50 price tag on it.  You get full sized products at a pretty reasonable price.

I recently purchased LORAC's new Multidimensional Beauty Collection for eyes and lips.  The particular set I bought is being sold exclusively at Ulta stores for $35 ($88 value).  The set touts glamorous "3D sparkle," and it contains three "prismatic, light reflecting, holographic shadows for dramatic, shimmering color" in Opalescent Gold with Pink Pearl, Amber Bronze with Gold Pearl, and Red/Brown with Green Pearl.  Also included in the set is a Multiplex 3D lip gloss in color Ulta Glam (peachy pink sparkle).  The products are all packaged in a blingy bag that can double as an evening clutch.


This set is based on the gimmick of everything being 3D and multidimensional/multiplex.

The first thing I noticed when I unpackaged the set is the neat bag.  It's hard to see it in the above picture, but below is a better one that shows how the colors change from goldish green to pinky magenta.  Plus, the bag is really well made.  There is a zipper pocket inside, and there is just enough room for the essentials for a night out on the town.  You could definitely throw your phone, cash/credit cards/ID, and makeup touchup necessities in here.  This bag is definitely a quality item and is not a cheaply made freebie.


You get 3 full size shadows and one full size lip gloss.  The back of the box shows two ways to wear the shadows:  dry look and wet look:


I first tried the dry look and was not overly excited about how it looked.  So I started over and tried the wet look.  I am not crazy about the Red/Brown with Green Pearl shadow (especially dry).  It definitely did not come off as green as it looks in the picture above.  But I can say for sure the colors change in different lighting, which indeed makes the shadows multidimensional, although I hesitate to say 3D.


Average White Girl recipe for the LORAC Ulta exclusive Multidimensional Wet look:
  1. Prime eyes with Urban Decay Primer Potion.
  2. Apply Red/Brown with Green Pearl to lid.
  3. Apply Amber Bronze with Gold Pearl to outside corner of eye and blend into the crease and up toward the brown bone.
  4. Apply Opalescent Gold with Pink Pearl to the brow bone and around inside corner of eye.
  5. Apply Amber Bronze with Gold Pearl along the lower lash line about 2/3 the way from the outside corner to the inside corner of the eye.
  6. Apply Opalescent Gold with Pink Pearl around the inside corner of the eye and along the lower lash line to blend into the Amber Bronze.
  7. Apply Urban Decay 24/7 Glide On Eye Pencil in Underground along upper and lower lash lines.  I created a winged effect on my upper lash line, then I smudged it out on my lower lash line.
  8. Curl lashes and apply a generous coat of your favorite black mascara to upper and lower lashes.
  9. Optional:  Apply LORAC 3D Liquid Lustre Shimmering Top Coat over entire eye or just on brow bone.  This product is also part of the LORAC 3D line.  I applied it to my brow bone and a little to my cheek bones.  It's hard to see in these pictures, but when the light caught it, you could really see the shimmer.  The product comes in a dropper bottle, and I found it works best to squeeze a drop onto the back of your hand and use a rounded shadow brush to dab it on.  You have to work quickly, because it dries fast!
Here are swatches of the wet shadows.  The top half of the swatch is with the 3D Liquid Lustre Shimmering Top Coat over it.  The bottom half of the swatch is simply the shadow applied wet. 
Amber Bronze with Gold Pearl, Red/Brown with Green Pearl, Opalescent Gold with Pink Pearl
The color intensities changed from dark to light when I moved my arm and caught different lighting.


Finished look!  I'm wearing the 3D lip gloss in Ulta Glam.
And how do I get that rosy glow on my cheeks?  With Benefit's
Benetint!

As gimmicky as this new LORAC set is, I do like the finished look.  The lip gloss is a peachy pink and is a great day time neutral look.  The shadow colors are unique, and even though I'm not a huge fan of the Red/Brown, I will definitely use the Amber Bronze and Opalescent Gold with other truer brown shadows.

LORAC also has an exclusive going on with Sephora right now.  They are offering the LORAC Multidimensional 3D Eye Shadow Palette for $38 (a $108 value).  You get six shadows.  Three are the same ones from this post (i.e. Opalescent Gold, Amber Bronze, and Red/Brown).  The three additional shadows are Silver with White Pearl, Royal Blue with Electric Blue Pearl, and Midnight Black with Holographic 3D Glitter.


Monday, January 24, 2011

Stila Color Wheel: Lavender Look (dry brush)

I'm continuing to experiment with my Stila Color Wheel and loving all the combinations!  Today, I tried out the Lavender Look.  The three colors used are White, Lavender, and Eggplant.  These colors are located at 8:00 on the color wheel:


The Lookbook specified to use a wet brush when picking up the shadows.  The look is very bold and dramatic, which I feel is more of a night time look.  I just wanted a simple day time look, so I used a dry brush instead of a wet brush.  Here is what the Lavender Look looks like when used with a WET brush:


When I dry brushed the shadow, the results were more of a soft smoky grey eye that was perfect for day time wear.  As you can see, the difference between using a wet brush and a dry brush is huge:


 Average White Girl recipe for the Stila Color Wheel Lavender Look:
  1. Prime eyes with Urban Decay Primer Potion.
  2. Apply White from lash line to brow bone.
  3. Apply Lavender to lid and blend up into crease
  4. Apply Eggplant along lash line and blend into crease up toward brow bone.
  5. Apply Eggplant along the lower lash line about 2/3 the way from the outside corner to the inside corner of the eye.
  6. Apply Lavender around the inside corner of the eye and along the lower lash line to blend into the Eggplant.
  7. Apply Benefit High Brow just under brow arch and blend.
  8. In this example, I used Maybelline Eye Studio Lasting Drama Gel Eyeliner in Blackest Black to line my lids.  Using this product will be a topic of a future post.  I absolutely LOVE this product.  It requires practice and a steady hand, but I love the results I get from it more than any other pencil eyeliner or felt tip pen liner out there.  I DID NOT use the brush that came with the product.  I used the Sephora angled liner brush #15, which works like a charm.  
  9. Curl lashes and apply a generous coat of your favorite black mascara to upper and lower lashes.
This is a nice way to show off the winged liner I like to create with the gel liner.  The shadows are pigmented enough to provide a nice soft smoke day time look, yet light enough to really showcase that perfect winged liner.

I'll do the wet brush Lavender Look in a future post to showcase a great night time look.  Until then, I hope you all enjoy this fun look!


Thursday, January 20, 2011

Stila Colorwheel: Rose look

I recently purchased the Stila Color Wheel, and I absolutely LOVE it!


It was offered as a limited edition eyeshadow palette for Holiday 2010.  It's an awesome buy, because you get 37 shadows plus a 16-page step-by-step Lookbook to show you how to create endless awe-inspiring combinations for both day and night.  The color wheel was offered for about $38, but I lucked out and got it on sale at Sephora for about $27.  I really like Stila cosmetics.  I've always been impressed with the high pigmentation of their shadows.


I tried out one of the color combinations in the Lookbook called the rose look.  Here's what it looks like in the Lookbook:


Colors used are the three at the 10:00 mark on the color wheel:  Pale Pink, Dusty Rose, and Aubergine.


This is a nice neutral, daytime look.  I put my own spin on the look by making it a little more edgy:


 Average White Girl recipe for the Stila Color Wheel rose look:

  1. Prime eyes with Urban Decay Primer Potion.
  2. Apply Pale Pink from lash line to brow bone.
  3. Apply Dusty Rose to lid and blend up into crease
  4. Apply Aubergine along lash line and blend into crease up toward brow bone.
  5. Apply Aubergine along the lower lash line about 2/3 the way from the outside corner to the inside corner of the eye.
  6. Apply Pale Pink around the inside corner of the eye and along the lower lash line to blend into the Aubergine.
  7. Apply Benefit High Brow just under brow arch and blend.
  8. Use Lorac Front of the Line PRO in black to line above lash line.  I like to create a small wing on the outside corners of my eyes for my daytime look.
  9. Apply Palladio Glitter Eye pencil in Black Sparkle over the Lorac liner to add an extra touch of glamour and sparkle.
  10. Curl lashes and apply a generous coat of your favorite black mascara to upper and lower lashes.
This look was simple to create, and it's a nice way to showcase manicured brows, long thick lashes, and the vintage pin-up feel the winged liner creates.  I hope you enjoy my take on the Stila Color Wheel rose look!  


Friday, January 14, 2011

Rosacea Regimen: Philosophy Purity wash and Mario Badescu Control Cream

So if you read my first post, you already know I have rosacea.  For anyone who isn't familiar, rosacea is a disorder of the skin prominent in light-skinned people of Irish-Celtic and Western European origin.  It is characterized by sudden dilation of capillaries along with heat (flushing), redness, and sometimes pustules and papules.  Due to the flushing of the facial skin, the sebaceous glands are stimulated and follicles irritated which causes red papules and pustules on the chin, cheek, and nose areas.  Trigger factors include anything from exercise, hot or spicy foods and beverages, alcohol consumption, skin care products, sun exposure, extreme warms or cold temperatures, to emotional stress.  This sudden flushing of blood to the face triggers a release of a biochemical in the skin called VFG, or Vascular Growth Factor which triggers the growth of new blood vessels, especially in the skin.  This further increases the chance of flushing making this skin disorder self-perpetuating. 


I don't know if it was coincidental timing for me, but my rosacea was triggered after I gave birth to my first child.  It probably had something to do with the extreme levels of hormones after pregnancy.  So I've been struggling with it for nearly 7 years now.  It started out as mild redness on my cheeks.  Then I started getting the bumps below the skin, which make my skin look rough and uneven.  It has evolved into pustules all over my cheeks and around my nostrils.  It's hard to treat, because I feel like I need to wash my face a lot to get rid of the pustules and oiliness.  But then my skin gets dried out, and the sebaceous glands produce even more oil to try to protect my enraged skin.  I have a very oily T zone while my cheeks and nostril areas are dry and flaky.  My face is actually hot to the touch, and the skin has become thick and bumpy.

I tried the pulsed dye laser treatment (PDL), as my dermatologist said this would be the only effective way to get relief from the condition.  This after I tried the usual course of antibiotics, pills, and creams with none of them helping at all.  The PDL treatment cost $1300 to do my entire face.  I was expecting to go in and get one treatment and have it be all better.  But I had to go back every month for the PDL for a little over a year before it was entirely gone.  It was explained to me that the laser cauterizes the small blood vessels under the skin that grew as a result of the VFG release.  The treatment itself was pretty horrible.  I had to wear special goggles, since the laser is so bright.  Since it's a pulse, it does a spot, stops, does a spot, stops, etc.  Every time it pulsed, it felt like someone was snapping me on the face with a rubber band as hard as possible.  It was almost impossible not to flinch while he worked the delicate area just below my eye skin.  The PDL caused bruising and swelling for a couple days afterwards.  It sort of looked like I got the crap beat out of me, which was even more embarrassing than the rosacea.  Finally, the redness was gone, along with most of the pustules.  But 18 months later, it's back and worse than ever.  It's frustrating.  I'm not sure what triggers it, because the list of triggers seems to be just about anything and everything.  I rarely drink alcohol, because that is probably my worst trigger.  That and spicy food and hot beverages.  And when I exercise and start sweating, guess what?  Flare up.

So a friend told me about a product made by Mario Badescu called Control Cream.  It's especially for the treatment of rosacea, and it contains Peru Balsam, which is a soothing botanical ingredient.  Ulta carries the entire line of Mario Badescu products, and I had heard great things about their acne line, so I figured I'd give it a try.

When I went to Ulta, I didn't wear makeup so the skin care lady could see what I'm dealing with.  She asked what I was washing with.  When I told her the orange Neutrogena salicylic acid wash, she about had a heart attack.  She said that stuff is way too drying for rosacea and suggested I try the Philosophy Purity daily cleanser.  It's made with all natural ingredients, plus it's made right here in Phoenix.

The MB Control Cream is $30 for a one ounce jar.  The Philosophy Purity wash is $20 for an 8 ounce bottle.  A little goes a long way with both of these items.

Here is the scary/brave part for me:  pictures of my skin with no makeup on.  I'm doing this to show you the severity of what I'm going through and to also see day by day progress with this skincare regimen.

These two pictures are each cheek before trying the MB and Philosophy products:


Day 1 of using the new products.  Sorry about the different lighting.  You can't really tell a difference.  I've learned to take pictures in the same spot at the same time of day to be able to adequately compare:


Day 2:  slightly less redness and congestion.  I've noticed the pustules aren't as numerous.


It's been about a week now that I've been using the Control Cream:


So far, the results are exceeding my expectations.  To see visible results on only the second day of treatment is great!  I'll keep posting pictures as the days go by.  I'm hopeful that these products are going to work.  I don't expect perfection, but I'll just be happy to have some relief from the embarrassing redness and pustules.

In a future post, I'll discuss my foundation/concealer routine that works best for me for maximum redness coverage.

Beauty Rhetoric

This is my first post.  Of my first blog.  I have so many other things on my plate right now.  Why do I want to do a blog?  Well, my first rule is that I'm not going to stress about doing the blog, because then it becomes a task, and tasks make me procrastinate and become complicated.  So I'll do this when I feel like it.  I'm going to stick to beauty as the main topic.  I like wearing makeup.  I like experimenting with colors and products.  I'm just an average white girl living the dream.  I watch a lot of makeup tutorial videos on YouTube.  Most of the girls who do these  have lots of practice and experience, because they're trained, professional cosmetologists.  I am not a professional cosmetologist.  But I think I do a pretty decent job at my makeup.  So I want to show you from an average white girl perspective how to do different types of eyes, lips, etc. based on what I learn from these videos.  In other words, I'll show you how easy...or hard....great....or horrible makeup can look when done by an everyday person.  I'm going to break down the beauty rhetoric.


The "white girl" thing is not racist, so stop.  I am an average white girl.  My ancestry is primarily from Celtic origins.  Thus, my skin is very fair.  Actually, I have severe rosacea.  It's so bad that if I go out without makeup, people look at me like they're wondering what happened to my face.  It's really embarrassing, and I hate it.  I tried the $1000+ laser treatment, but that only provided relief for about 18 months.  I'm willing to try anything to get it better, so I'll discuss regimens on what I've tried so you don't have to waste money on stuff that doesn't work. 


Anyhow, back to average white girl.  So yeah, I'm a white girl.  And I think I'm pretty average.  I live a middle class, suburban, white girl life.  I go to Target.  I eat baby carrots.  I watch Tosh.0.  I have two awesome kids and a great husband.  I'm a stay-at-home mom.  I bake cookies.  I do laundry.  I clean toilets.  I vacuum a lot.  I scoop kitty litter.  I take the trash out every Sunday night.  Pretty average.


I like to experiment with my hair.  I've been doing this since the 6th grade when Mr. Scherer, my 6th grade home room teacher, challenged me to cut my hair that had grown down to the middle of my back.  He said he'd buy me a can of Coke.  I was a nothing back then.  Okay, so I was the smartest girl in my class every year.  And the tallest.  But aside from that, I was nothing.  Nobody knew who I was.  Nobody cared who I was.  Something about that day when Mr. Scherer challenged me to cut my hair lit something within me.  It was a reason to change myself and be who I wanted to be, not so much the person that society wanted me to be.  So I cut it short.  I remember people in class staring at me, because they couldn't believe I had done it.  He gave me that can of Coke.  In 1984, short hair on girls was strange and different.  I started associating myself with the whole new-wave music scene.  I started wearing strange clothes (by Indiana standards).  I realized people began to notice me.  I began to be made fun of.  A lot.  But who cares, because people knew who I was.  I was something other than tallest and smartest.  I was weirdest.  And I liked it.


I also like making my own jewelry and hair accessories.  I like making stuff for my friends to wear.  So you may see some of that on here as well.  One of these days, I'll sell my own jewelry on Etsy.  But one thing at a time.


So this is my little intro for my blog.  I'm technically challenged, so I don't know how to make it look pretty or create my own banner or anything like that.  I think it looks okay the way it is for now.  


My first few posts will be about a beauty regimen I'm doing right now for my rosacea.  I have a before picture of my skin, then I'll post pics of my skin daily as it responds to the products.  No makeup or anything.  I'm brave.  I'm average.  I'm hitting the publish button with some mild trepidation.  Here we go.